The truth about dust

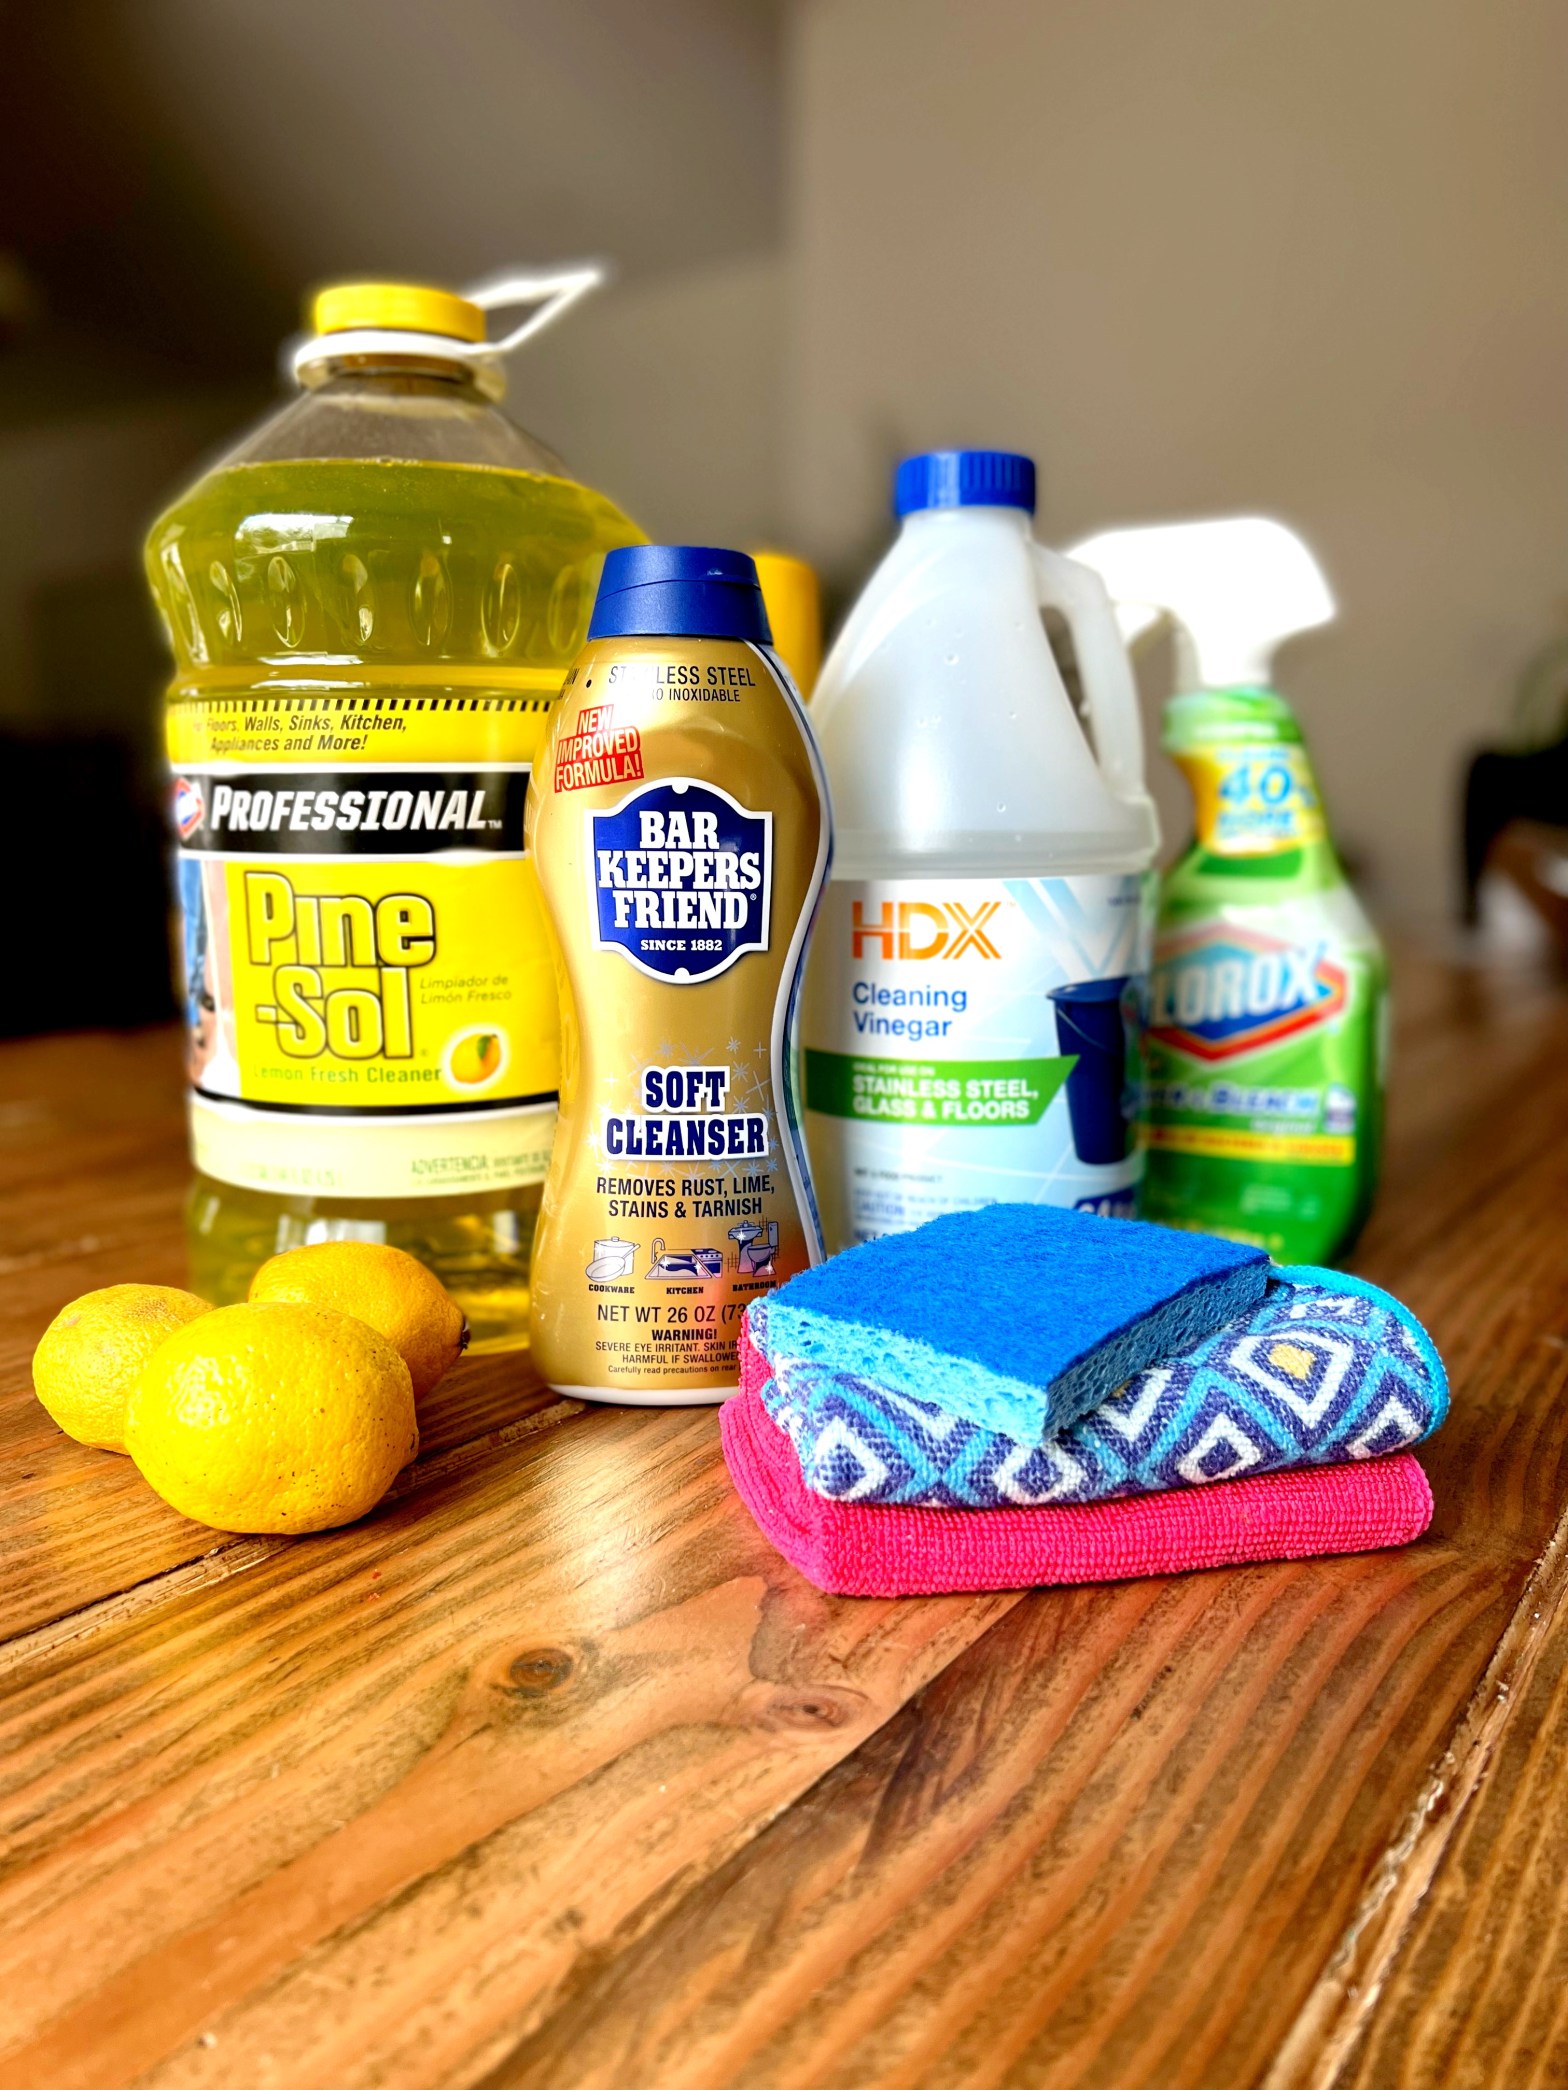
Happy New Year! Well, I know we are in the middle of February, but it’s my first time greeting ya’ll this year. I took a year-long hiatus to work on my new course entitled “Cleaning Hustle“- which is a course I designed to help other women start their own cleaning business. Starting a cleaning business has been so rewarding for me, and I am excited to teach others how to not only launch a business, but keep your profit high, expenses low, and retain your clients. These elements are so important and are all the keys to having a successful cleaning business, whether you keep it small or grow it as large as I have. This was such a labor of love for me, and I am so proud to be able to share it! You can check it out here if you are interested!

Anyway, back to my topic of dust. You aren’t going to like this post. The saying “Ignorance is bliss”, will totally make sense after you finish reading this. BUT learn you must!

We fail to realize the health consequences dust and mold have on our immune systems. The Journal of Environmental Science and Technology released a report about how harmful dust really is. ACS Publications also released a similar report on their findings which can be viewed for free on the ACS Publications website at pubs.acs.org.   To sum it up, they sampled dust collected all across the states and found 45 harmful chemicals (what the??) that came out of the dust. Say that again to yourself, “chemicals came out of the dust” ..ewww. These chemicals, unfortunately, do not stay IN the dust, but rather come off of the dust and go straight into our bodies because they are so small. (I’m literally sneezing just writing this!).  They are in the air we breathe, and the objects we touch.  

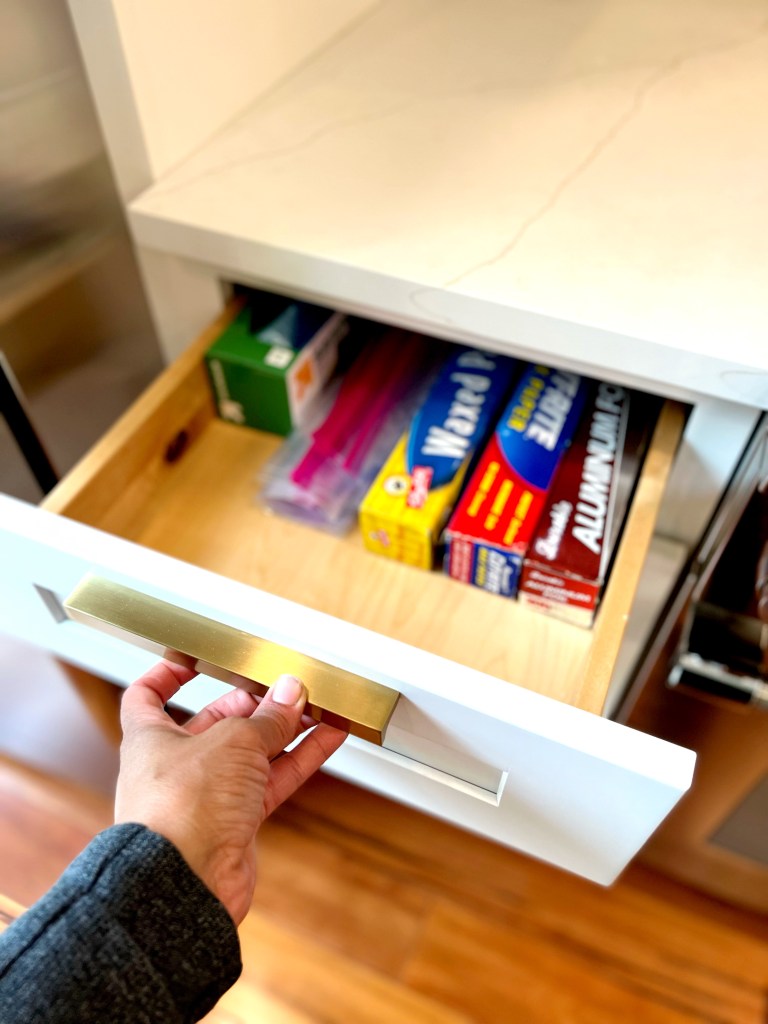
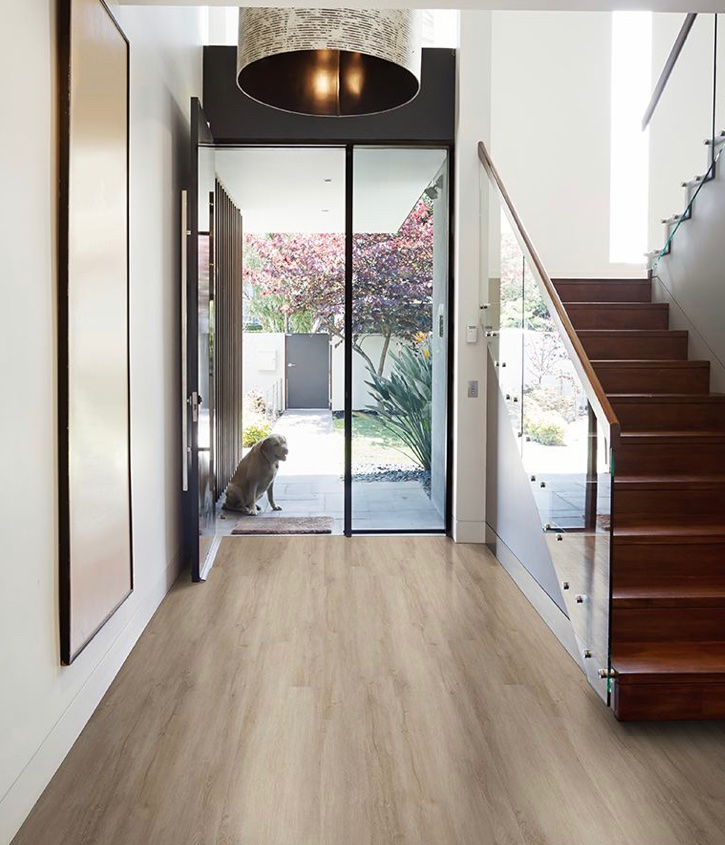
Phthalates, one of the worst contenders, are a class of chemicals commonly used to soften plastic. This represented the highest concentration of dust particles. These are found heavily in vinyl flooring, cosmetic products, and many things packaged in plastic, like baby wipes.

The second most dangerous chemical they found was flame retardants. These are used in baby products, furniture, and insulation to meet flammability standards. I’m sighing so loud as I write because there just has to be a better way. The odds of you catching on fire from a product MUST be lower than your odds of getting sick from these “protector chemicals”. 

Because these two chemicals are in so many products, having them in your home releases dust and chemicals into your home, especially in the air you breathe.

The other effect of inhaling these chemicals is they lead to reproductive and endocrine toxicity. Endocrine toxicity, results when a chemical interferes with the synthesis, secretion, transport, metabolism, binding action, or elimination of hormones necessary for endocrine functions resulting in loss of normal tissue function, development, growth, or reproduction. *

Until we as a society can and will find a better way to make products, you need to get that crap out of your house... and fast. I’m not trying to scare you into cleaning (unless it’s working), but in full disclosure inhaling the chemical from dust is not the primary way these chemicals get into our system, but it is ONE of the ways. SO, you need a game plan to eliminate this dust from your house, that requires more than an air purifier…and that’s with cleaning.

“I don’t have time to dust!”. I hear it all the time. Make the time. You don’t have to do a full-on “Project 101 Detail Dust BootCamp” to keep your house dust “free”, or should I say “less dusty”.

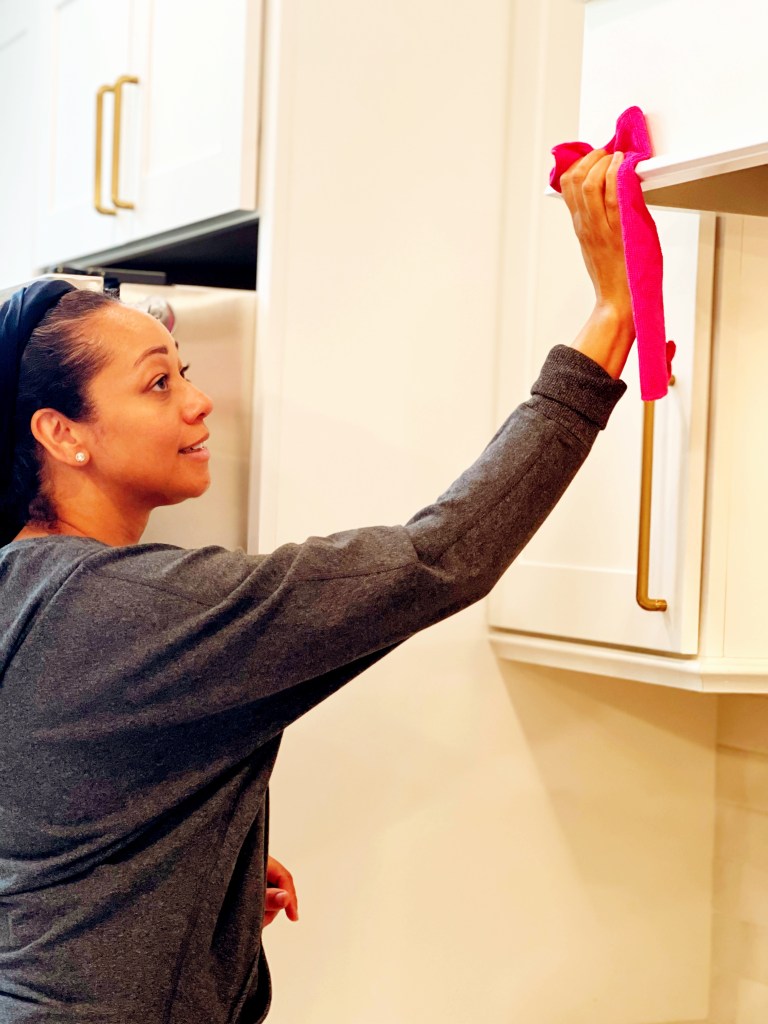
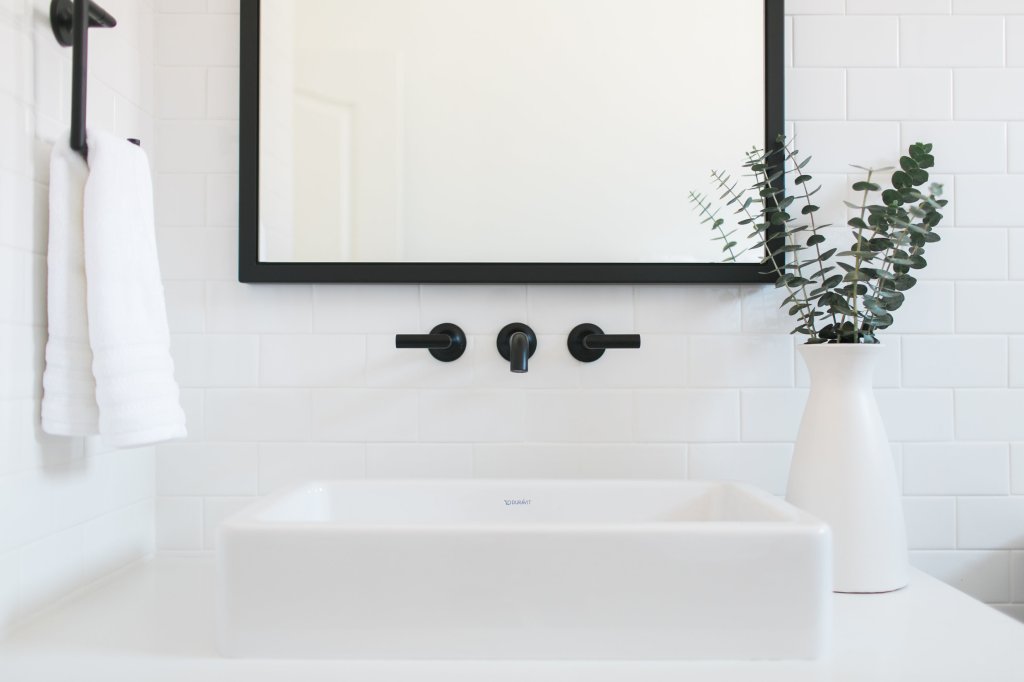
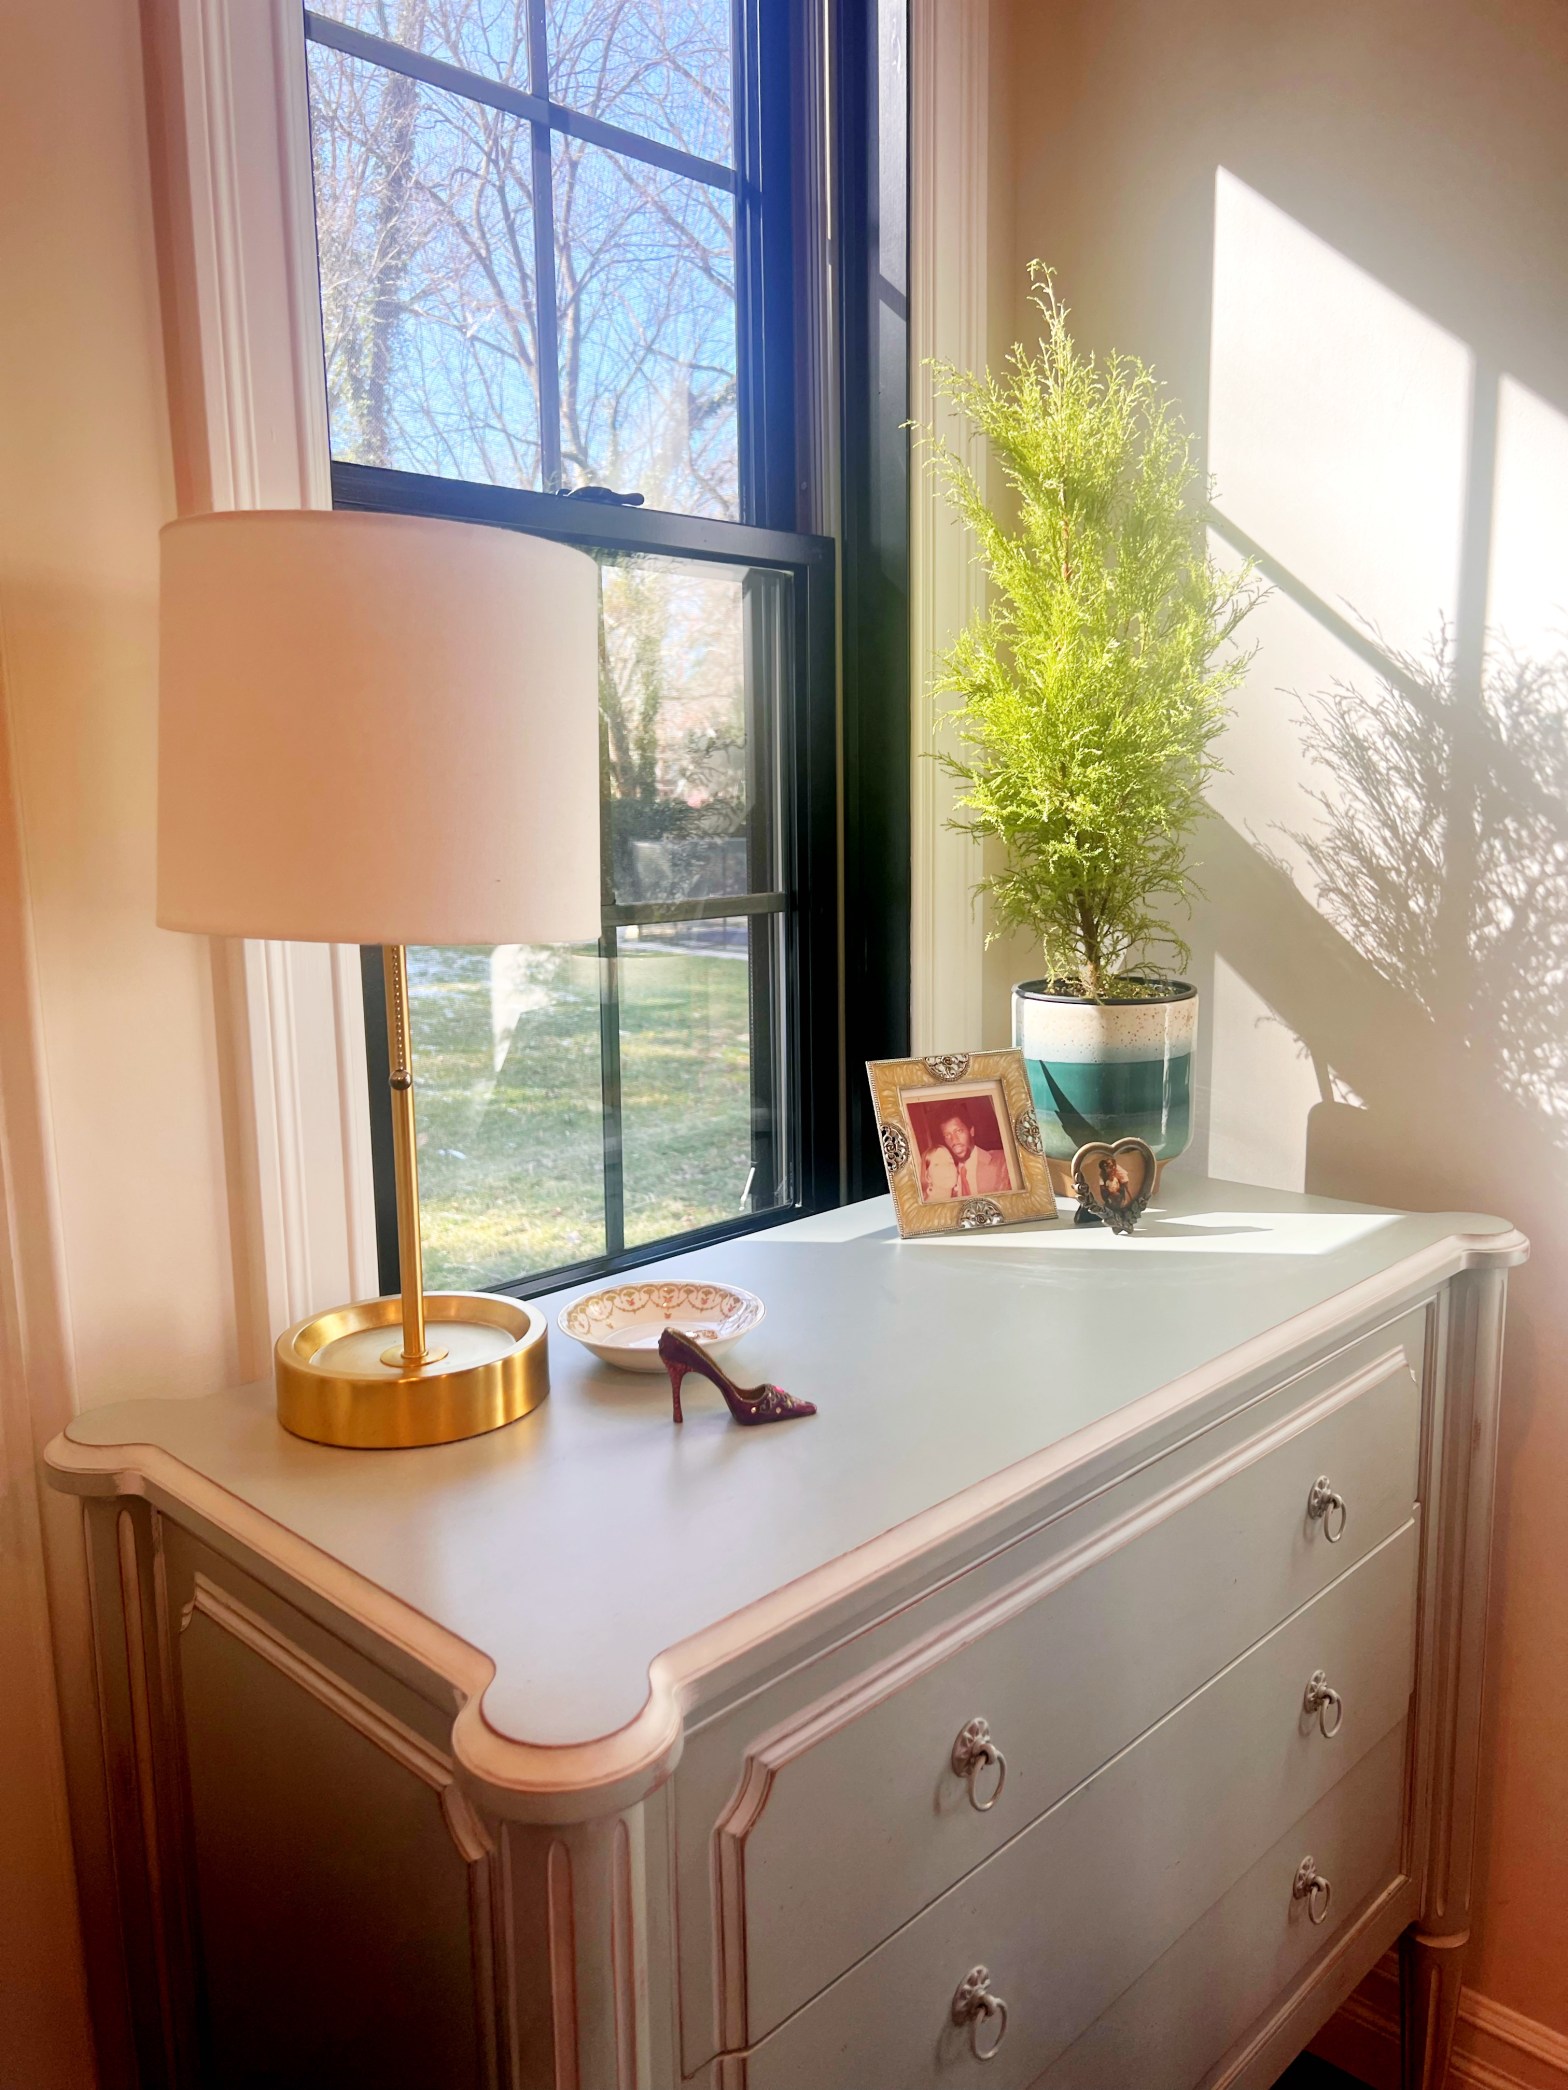
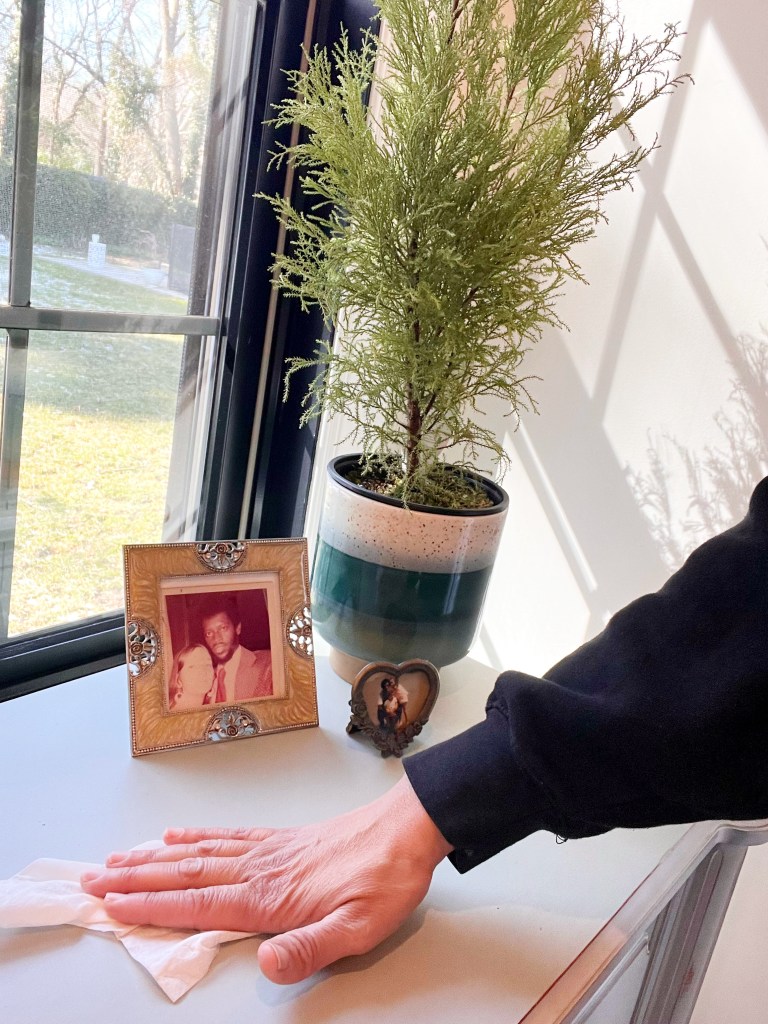
One way to start is by just grabbing a damp paper towel or cloth, and wiping the window sill, the tops of dressers, the nightstand, the coffee table, etc. I’m talking about a 10-second wipe-down a few times a day throughout your house or apartment. I have black windows, and I can see so much dust in them. I swear I wipe them daily, and you would still never know I clean them at all.

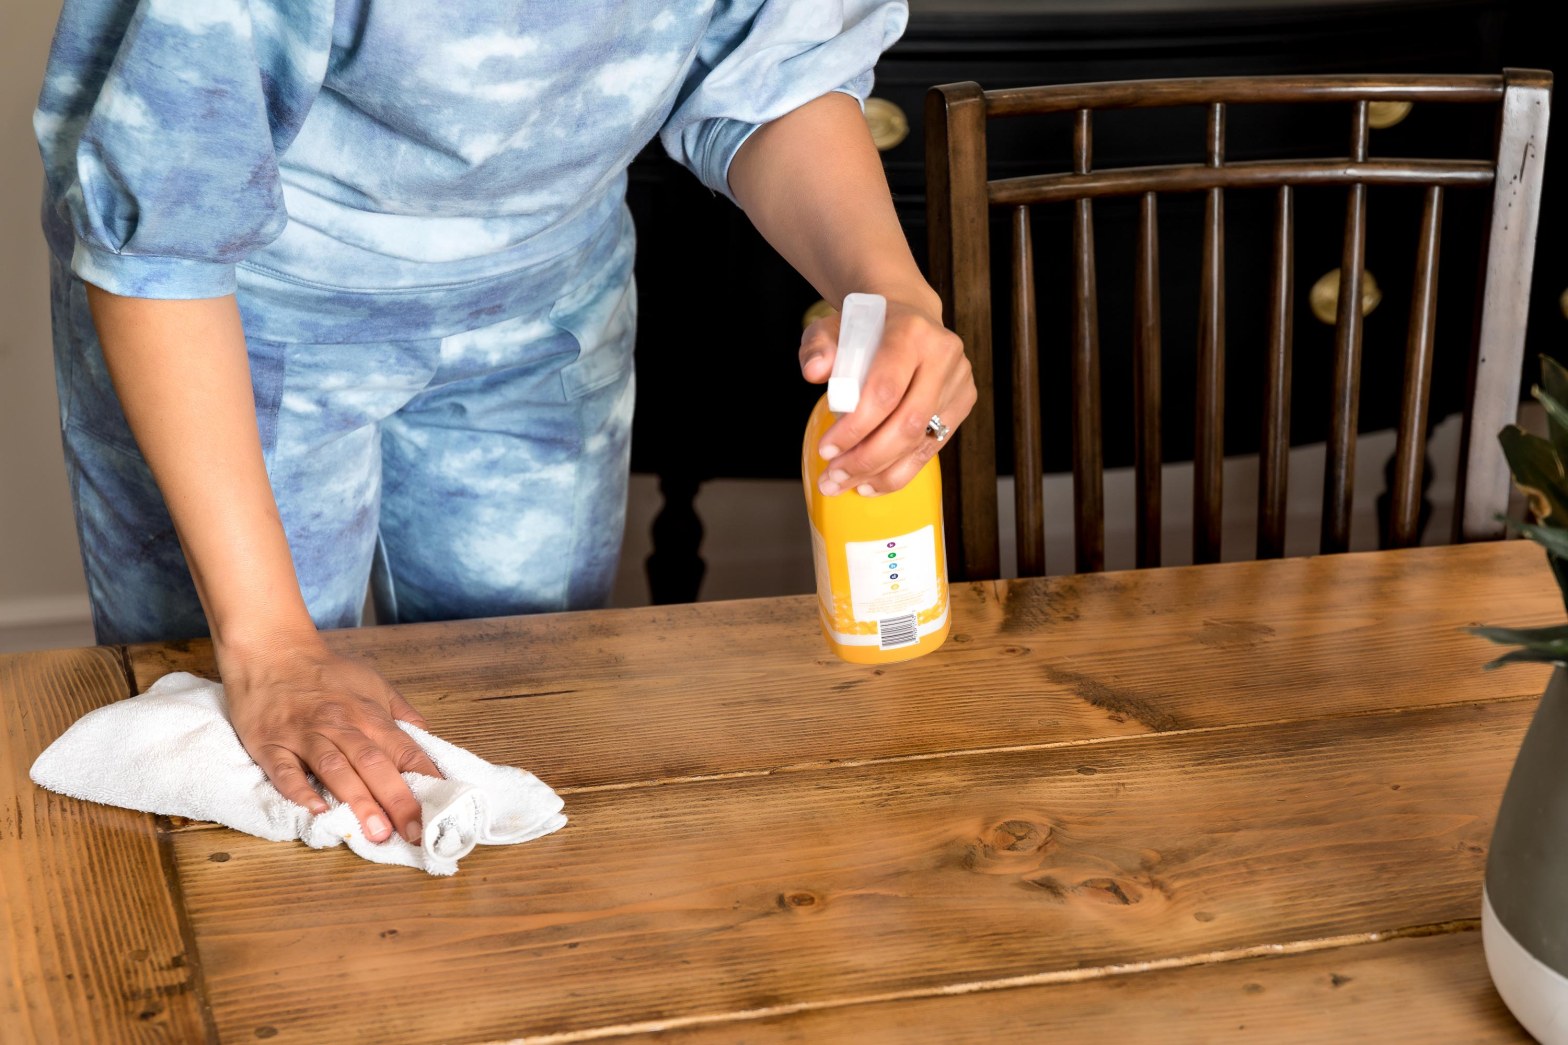
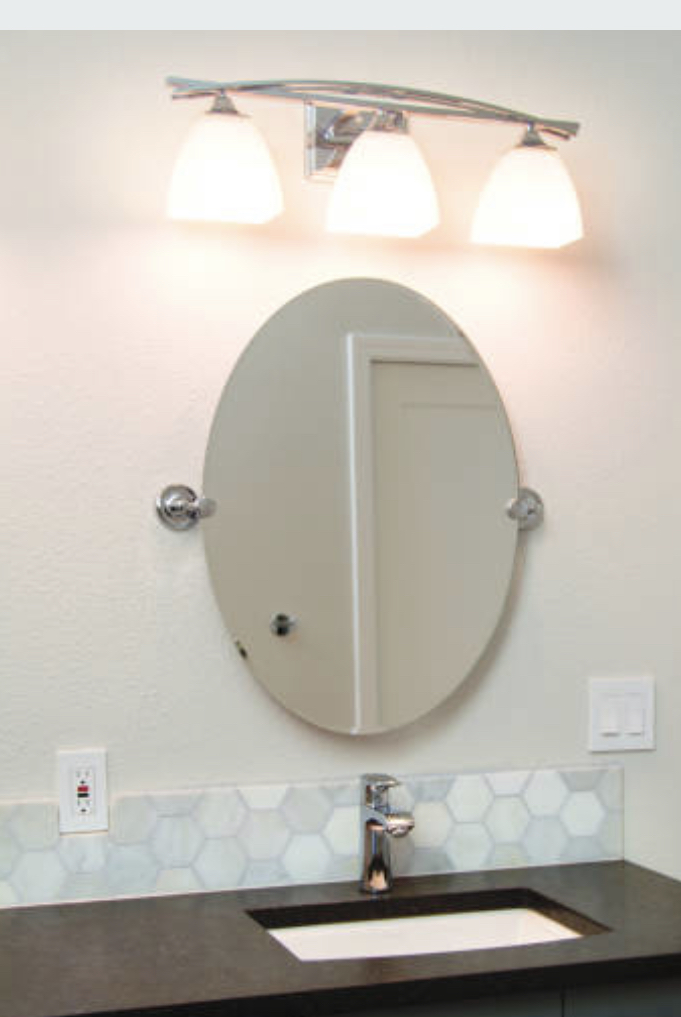
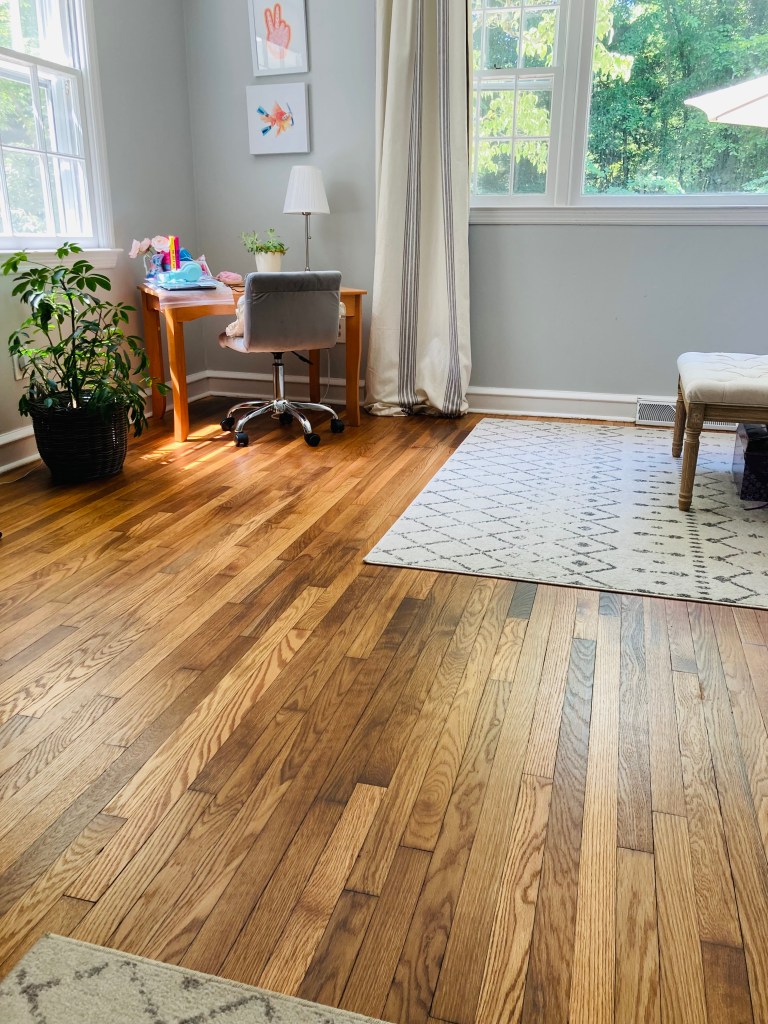
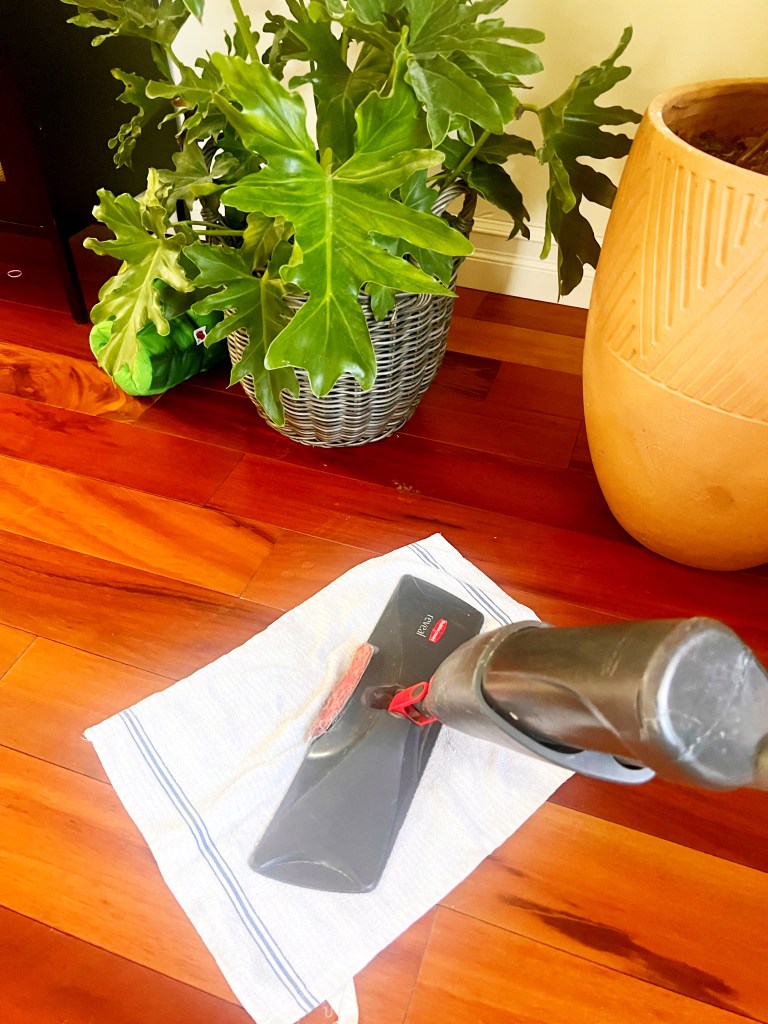
Another quick way to keep your hardwood floors dust-free is to take a slightly damp cloth with water (like a teaspoon of water on it, not much more) on the bottom of your floor cleaning stick (whatever that may be) and run it along your hardwood floors in between cleanings like shown below. The damp cloth method I do in between cleanings traps the dust onto the cloth and removes it from the floors. I either shake it outside or rinse it slightly to clean a large area. Sometimes a few rags may be necessary. You don’t want to wet the rag too much, bc then you may drag dirt around and leave streaks on your floors. You do not need to sweep or vacuum when you do this, because the goal is to remove dust, not dirt and stains. You can save that type of cleaning for your full floor cleaning days when you vacuum, sweep, and mop.

Make sure your dirty rags get washed in hot water in the washer matching, and put in the dryer when you are finished.

Around 4:00pm, my house gets the “magic hour” sunlight, and boy can I see ALL the dust floating around on the floors. You have no idea how much dust is trapped in your house until you can see the sun directly shining a light on it. Just because your floors hide the look of dust, does not mean the dust is not there. If you really want to know how dusty your house gets, look at it when the sun is shining through your windows. That will give you a good idea of how dusty it is, and how often you need to keep up with it.

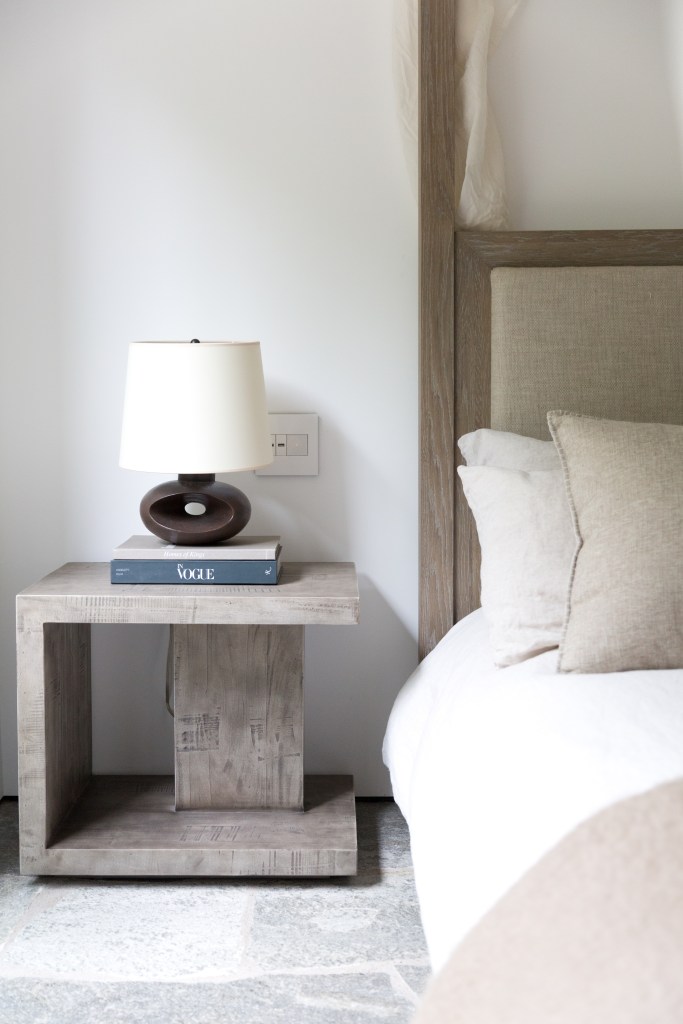
Another important area you want to keep clean is your sheets. Sheets, and kids’ stuffed animals (if they have allergies), should be cleaned once a week in hot water.

As we sleep at night, our skin sheds, which then allows dust mites to feed on our skin, and grow stronger….this is one fact I wish I never knew. This is the main reason our household showers before bed, and not in the morning.

But the best way to get rid of these little buggers, as well as dust in your bedding is by washing them in hot water above 135 degrees once a week. I decided to wash the sheets the same day each week so I don’t lose track of when they were done last. This helps me immensely because laundry is hard to keep track of. I wish I could take my vitamins the same day once a week, I would never forget them….I digress

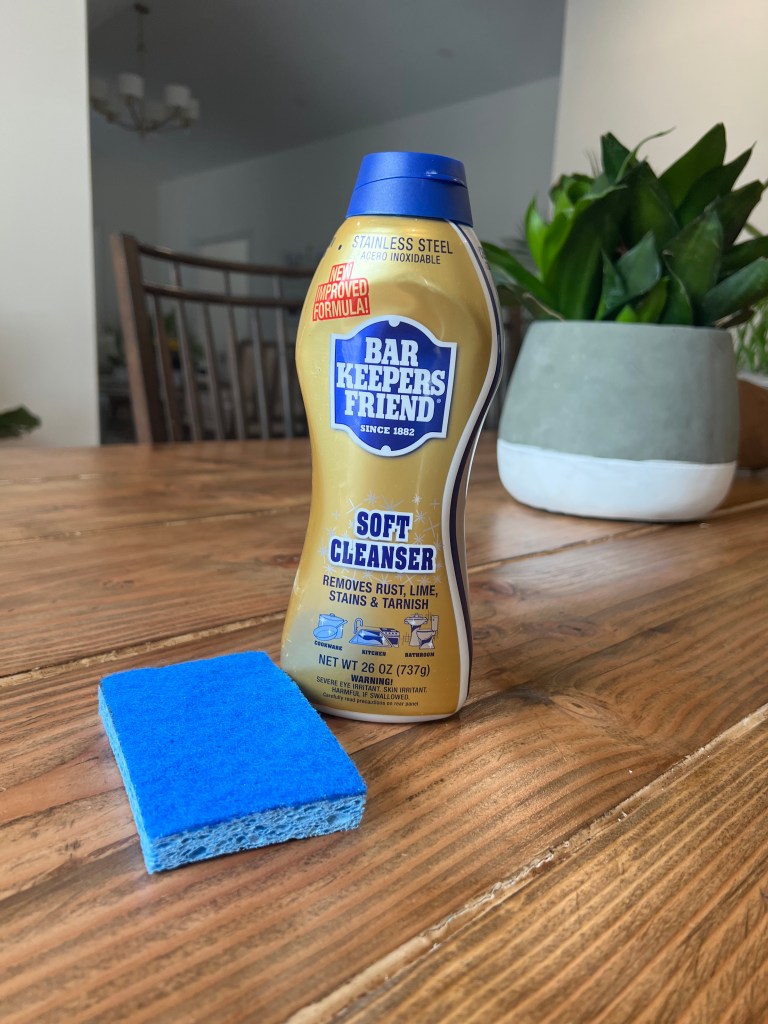
The last area that can help keep the dust levels at your house is to remember to change your filter! Once a month is best, in my opinion. I know it’s excessive, but dust is excessive. This is especially true if you have allergies. And also don’t forget to get your vents cleaned once a year by a professional. They remove the dust and dirt you can’t reach in your HVAC pipes because not all of it can get trapped by the filter.

It may be surprising to you that I am not mentioning getting a good air purifier. While these do work, and I have them in my kid’s bedrooms, I have found that they do not keep the dust at bay as I had hoped they would. They definitely clean the air, and I notice a huge difference when we forget to turn them on in the kid’s rooms at night, but I have not found the dust levels in our house lower that much.

So do I recommend them for keeping the air clean? Absolutely. But do I think they keep dust away..not so much. It is still important to manually remove the dust yourself.

There are many more areas you need to clean to ensure you have removed the dust from your home, but the purpose of this post was to give you quick tips between your full cleaning to help keep the dust away.
I will do another post soon on the areas that need deep cleaning as part of your spring cleaning routine.

For now, I think I have successfully grossed you out and hopefully made you more mindful about keeping the dust to as low a level as possible.

Until then, stay Squeeky!

Michelle M

*Andrew Walder, Progression in Molecular Biology and Translational Science

Almost perfect kitchen cabinets

Organizing your kitchen cabinets is one of the most important areas you can focus on when tackling organization projects in your home. They are likely the most frequently used places, and a lot of time is spent searching and looking for items. There are many great blogs and sites on how to best organize your pantry and cabinets. This is not that blog! Haha! 

The purpose of THIS blog is to help you clean the outside of your kitchen cabinets, know which products to use on them, the best steps for cleaning inside your cabinets, and a few tips for keeping them clean and organized. 

Cleaning the doors of your cabinets

This is something that likely needs to be done once a week if you have a house full of people, or once a month if you live alone. I noticed when I have done work for new customers in the past, that one of the dirtiest places on their kitchen cabinets (besides the knobs) was the top of the cabinets. The top rim on cabinet doors, collect lots of dust and rarely get wiped because we have a habit of cleaning what we see. The top rim of your cabinet is likely full of dust and cooking grease.

The fronts of cabinets tend to be the dirtiest near the knobs. This is from our dirty hands making marks on them, that does not get wiped up. For anyone who has a cabinet that stores your trash can, you can attest to how dirty the inside of that cabinet gets. It is so important to wipe that out once a week at the very least because once the food gets stuck on there, it is hard to remove it without ruining the finish of the cabinet.

It is also important to know which type of cabinets you have, so you do not use the wrong type of cleaner. The two main types I will discuss are laminate and hardwood. 

Laminate cabinets can take a serious beating! It is really hard to destroy these with cleaning products. Some cabinets I have cleaned were completely soiled in grease and cigarette smoke and I had to use oven cleaner on them, and still didn’t ruin them! Though I am not recommending you do that (unless this is your last resort before replacing them), I am only making the point that most products will safely clean them. My regime goes as follows: 

White Laminate : 

  1. Spray Clorox clean up on the door fronts (using a mask and having a well-ventilated kitchen)
  2. Use a warm wet washcloth to wipe the surfaces until clean
  3. Follow with a dry cloth, and for that extra clean smell, spray a tiny bit of Lemon Pinesol on the dry cloth (or your favorite cleaner) before you wipe them dry.

Dark Laminate: 

  1. Use a bucket of warm water, and add ¼ cup Lemon Pinesol, 1 tablespoon of soap, or your favorite cleaner.
  2. Wipe the cabinets liberally with the cleaning solution until clean. 
  3. Follow with a dry cloth, and wipe until all water and smudges are gone.

Last Steps: whether you have white or dark laminate, make sure to disinfect those handles. For this step I do the following:

  1. Cut paper towels into small squares I use a half sheet and cut it into 15 small pieces as shown. You will need several because you are going to use one square per knob. 
  2. Use your favorite disinfectant such as Clorox Clean-Up, hydrogen peroxide, or rubbing alcohol (and contrary to what you may find on social media, vinegar is a disinfectant but it only kills SOME germs. I don’t know about you, but I’m looking to kill 99% of bacteria! Insert Cardi B’s “ okay”  here). Spray a little bit of solution to one square, wipe the knob completely, throw away the square, and start again with the next one!

Hardwood Cabinets

My friend’s brand new beautiful kitchen

Hardwood cabinets can be custom-made to fit your space, can add more value to your home, and last longer than laminate. However, they are more sensitive to cleaning chemicals and require care and caution when cleaning them. Because of these factors, I use only gentle cleaning agents on the doors. Diluted Lemon Pinesol (¾ parts water to ¼ lemon pine), Murphy’s oil soap (yes they still make this), or just dish soap and water (especially, if you have recently repainted your cabinets). For tough stuck-on grease and grime, a solution of 2 parts water, and one part white vinegar is a good mixture to you use as well. You can also add a few drops of grease-fighting dish soap to this solution as well. The steps I use to clean them are: 

  1. Make a spray bottle of one of the above mention cleaners.
  2. Spray your cabinets one at a time as you clean ( I do not recommend letting the cleaning solution sit on the cabinets).
  3. Wipe clean with an old t-shirt, or microfiber cloth to remove grease and grime. I would NOT use a dish sponge, non-abrasive sponge, NOR scrub brush. This could not only ruin the protective finish on your cabinets, but it can also scratch the surface.
  4. Finish with a dry clean t-shirt, micro-fiber cloth, or my favorite a paper towel.  
  5. Lastly, as with cleaning laminate cabinets, you also need to wipe down the hardware with a disinfectant.  Follow the “last steps” from the laminate cleaning steps.

Cleaning the inside of the cabinets

This step likely will take the longest. In this phase, you are 

  1. Throwing away hard and unused spices, food, Tupperware, etc. 
  2. Wiping down the tops and bottoms of shelving (for spills and cobwebs) with the same cleaning solution you used to clean the doors of your cabinets.
  3. Organizing the items in a way that makes sense to you. No one system will look the same, because organizing isn’t a one size fits all kind of thing. I do have a few practical tips for organizing your items, however.

Here are a few ideas you may find helpful:

-for spices, I love to store them in a multi-tier level organizer. This helps me see everything I have at eye level without having to move them all around.

My other favorite organization obsession is these lazy susans.

I wish I could find one big enough to store all my clothes on!

Both of these can be found at my favorite, The Container Store. 

-For canned goods, I place the cans I use more frequently to the left, like beans and tomato paste ( I probably go through about 4-5 of those per week). The other cans I use less frequently go to the right. 

I like to put the kid’s snacks on the two bottom shelves in my pantry so I don’t have to get them for them. This only works if you have kids like mine who ask before they grab snacks before dinner 🙂

These are just a few examples of helpful tips, and as you begin to restock your shelves, you will know what works for you! 

And lastly,

  1. For a more fulfilling and gratifying organization experience, you may also add lined paper such as tack paper, or my favorite -peel and stick wallpaper. Adding this fun step helps incentivize you to keep your cabinets clean and organized. At least for me, it does! 

Cleaning the items in your cabinets

This also is one of the most important steps in keeping your kitchen free from bacteria and germs that will ultimately spread throughout your house. There are items we touch on a daily basis with dirty, bacteria-filled fingertips and we do not realize the impact they can have on our overall health. Most of these items are containers that are touched as soon as you or your children come into the house, or worse yet, items you touch while cooking with raw meat. Here are a few areas you may be spreading bacteria to and not even realizing it:

Spices you use while cooking

Containers that hold snacks for you or your family

Containers that get re-filled over and over again (i.e flour and sugar containers)

These items need to be washed with hot soapy water on a continual basis. For example, I try to switch out my spices to glass spice jars, because I like to wash them down with hot soapy water (the main 4 I use daily) every day. I am constantly touching raw meet, and opening cabinet drawers and doors. To the best of my ability, I wash my hands after I touch raw meat -but guess what? I am human, and busy and distracted juggling other things at the same time. So on the off chance I did not successfully wash my hands, I go back with my paper towels, or Clorox wipes and wipe down all my cabinet hardware and drawer pulls. While dinner is cooking, I wash down my used spice bottles from that cooking session (tight lids needed for this task!). It sounds like a lot, but I am only wiping one or two doors down and it takes just a few minutes, and I am usually doing this while I wait for the food to cook.

These are just a few examples of how easy it is to cross-contaminated in your kitchen. Can you think of others?

I know I usually have 5 steps or 5 things for you, but I am not a fan of making up stuff just to talk! I believe this routine is what you need to properly clean and organize your kitchen cabinets. If you can get into a good system of cleaning then this project doesn’t need to take too long each time. It will take a while the first time, but if you can implement this into a schedule, it could help you in the future:

Cabinet doors and pulls-once a day (with wipes)

Door fronts -once a week, or once every other week

Inside your cabinets -once every 6 months

You can also opt to clean the inside of your cabinets just once a year, and that’s okay as well. Just as long as you are wiping down those spice bottles, and refrigerator door handles frequently, the world won’t stop because the inside of your cabinets isn’t the cleanest.

SO there you have it, my tips for clean cabinets. I hope you found them useful and are able to put them into practice right away!

Stay Squeeky!

Michelle M

5 Tips for Keeping Your Home Tidy Even When You’re Busy

Sometimes, it just feels like there aren’t enough hours in the day to get things done! Juggling work, family, and everything else you have going on can be really taxing. With a never-ending to-do list, many of us can’t afford to spend hours on end cleaning our homes.

As a businesswoman and mom, I understand this struggle all too well. At the end of a long week, I just want to cuddle with my husband and kids and have some family fun time, not spend the afternoon cleaning!

That is why I came up with 5 easy ways to keep my home clean and tidy, even when I’m busy. Maintaining a tidy home is always easier than cleaning a messy home, so it’s all about clearing as you go. I try to declutter and do a big clean once a week, but this is my basic routine for daily cleaning to keep my house as clean “looking” as possible in between my big cleanings.

Here are my 5 easy cleaning tips for busy people:

1. Create a landing zone by your front entry.

After a long day, we’ve all been guilty of throwing our coats and bags on the floor before crashing onto the couch. Wintertime adds more articles of clothing that land right by the door and can make your front entrance a total mess! Having a designated place to store these items when you get home helps to clear a lot of the clutter.

Not everyone has the luxury of cubbies or a mudroom, but turning your front closet into a landing zone can be helpful. You can use small containers to keep things organized. In my home, each of us has a designated plastic container (yup the super fancy ones you can get from the dollar store) and we throw our hats, gloves, and scarves in there as soon as we get home. They get stacked on the floor, with their name label facing out so they can easily find them. 

I even turned it into a game for my toddler, who now places his things in there the minute he walks through the front door! Since my kids are still not able to reach the hangers, I screwed hooks into the wall at a low height for them to place their coats on. 

Doing this only takes a few minutes, and it makes a BIG difference. Having your coats, hats, gloves, and shoes out of the way really helps to keep your front entrance and living area tidy.

It also saves you time from having to search the house for your belongings. Everything you need is all in one place, you’ve just got to grab and go! 

Another thing that’s a total game-changer is having home slippers by the front door. By removing your shoes and slipping into cozy home slippers, you’ll prevent tracking any mud, dirt, or allergens into your home. In the summertime, we have designated flip-flops. 

2. Clear your kitchen island and counters.

If you don’t have time to do anything else, focus on clearing your kitchen island. This will give the illusion that the rest of your kitchen is clean. I don’t have a kitchen island, so for me, it’s important that I keep my counters clean.

To be honest, I don’t have time to constantly keep up with my dishes, but rather than leave them all over the counter, I make sure to stack them in the sink and load my dishwasher later before I go to bed. Just the simple act of clearing the counters can make your kitchen feel much cleaner. 

I hear so many people say they can’t leave dirty dishes in their sink. Well, I am not that girl! I would much rather take the few minutes I have before I run out the door to clean off my counters and leave those dishes for the dishwasher at night. It doesn’t matter how dirty or stuck the food gets, my dishwasher always gets them sparkling clean. It’s my second favorite item in my house, besides my bed. 

 Keep your bathroom sink clean. 

A cluttered bathroom sink can be really chaotic!

Instead of piling all your skincare and make-up products on top of the sink, organize them using small baskets and keep them in drawers or under the sink. Separate them according to your morning and nighttime routine. Take each basket out when you need to use those products, and place the basket back inside the cabinet or drawer once you’re done. I like to lay my products flat in the baskets so I can see them all.  They aren’t stacked by size, or color (ain’t nobody got time for that!), just flat so I can easily see them. Then I stack the baskets on top of each other under my sink. They look like this:

My drawers can’t really fit containers, but I don’t really need them because I can see straight down into them also. No fancy system here, just everything laying flat so I can see it and put it back in seconds. (I have seconds to spare in the morning,  not minutes!) My drawers look like this:

fancy socks are subject to change

After I quickly stack my things back, I grab my handy wipes (usually baby wipes because I save Lysol and Clorox wipes for sanitizing) and I wipe my counter and inside of the sink to remove hair, dust, and toothpaste. 

Make your bed.

I can’t stand walking into my bedroom and seeing the bed not made! It gives the impression that the room is super messy, even if it isn’t. This simple task of making your bed takes less than 5 minutes to do and totally changes how your room looks and feels! 

Let’s face it, we don’t have time to pick up our clothes every morning before we leave the house, so removing this step from your morning routine can help save you a great deal of time. I try to dump my dirty clothes right in the hamper, but my nightstand stays a total mess all the time! I can’t get it together with that! I just ordered a nightstand with drawers to see if this will help with the visual clutter. But making my bed every morning makes a significant difference in making my room appear much neater than it sometimes is. 

I also have my children make their beds as well on the weekends. Even if they pull their blankets up, with the sheets messy underneath, it makes a huge difference. Kids are never too young to start this habit. 

Try to clean your sheets in hot water once a week to keep dust mites at bay. I do this the same day each week so I don’t lose track of when it’s done. 

5. Clear your coffee table. 

Your coffee table is usually the first culprit when it comes to clutter hotspots! It often ends up accumulating used cups, plates, magazines, and other random items throughout the week.

One simple way to keep your living room neat is to clear your coffee table every night. Move any used cups to your kitchen sink or into the dishwasher. Put away anything else that doesn’t belong on your coffee table.

Sometimes, remotes, gaming consoles, books, and blankets were strewn all over the living room can make the space seem cluttered. What I usually do is keep these items in a decorative basket and store them under the coffee table. This removes clutter off your coffee table and keeps your living space looking tidy.

And that’s how I keep my home tidy even when I’m super busy. If you’re busy and the idea of cleaning stresses you out, be sure to give this a try. Remember, you don’t always need a lot of time to clean your home, just a few creative and time-saving strategies will do! 

Sending you squeeky clean thoughts,

Michelle

5 Must-Have Cleaning Products Under $5

When you walk down the cleaning supplies aisle at the supermarket, the shelves are stocked with so many brands and products. Cleaning companies are constantly enhancing their product, adding new scents, and packaging. It can become confusing which ones work, which ones you NEED, and which ones you WANT. For example, I love to buy Meyers and Methods different scented multipurpose sprays for my kitchen counters and tables. The new scents make me happy and look forward to cleaning. Do I need to buy them? No, I can stick with the basic ones I have.

Once you add a variety of cleaners into your cart to clean everything in your home, from the floors to the toilets, you’ll probably feel faint looking at the hefty bill! But it doesn’t have to be that way. As a cleaning professional, trust me when I say you can clean your home effectively with just a handful of affordable products.

There are 5 must-have products that I always carry in my cleaning bucket, and have for the last 20 years (only adding one item in the last five years). What can I say? I am a creature of habit. Hopefully, my habits will help save you money!

Here’s my 5 must-haves under $5:

1. Lemon Pinesol

Let’s face it. Our homes can often house a variety of different odors. From musty to downright stinky, I’ve seen it all. This is why I always carry a deodorizer in my bucket to get rid of any unpleasant smells and leave a fresh scent in its place. I like to call this Squeeky Clean’s “signature scent”. I can’t tell you how many times I am cleaning, and people stop and breathe loudly and say “it always smells so good when you and your staff clean here!”

Lemon Pine-Sol is a lemon-scented deodorizer that kills odors such as urine, grease, dirt, and grime. It’s a versatile product that can be used to clean laminate and hardwood floors, bathrooms, and kitchens. I use this in combo with Windex to dust, clean toilets, and wipe floors (except stone floors). It is basically my multipurpose cleaner, and you will NEVER find me cleaning without it!

Since this is a dilutable cleaner, a little goes a long way. Just mix ¼ cup Lemon Pine-Sol with a gallon of water for general cleaning. To clean your toilet, just a teaspoon (or capful) will clean your toilet.

Nothing beats the feeling of walking into a room and having it smell citrusy fresh!

2. Clorox Clean-up

I know what a lot of you are going to say. “Clorox Cleanup is very harsh!” This is very true, however, when you have to clean some of the places I have had to clean, there is not a single all-natural product that cleans as-good-as Clorox Cleanup. The only natural substitute for this is hydrogen peroxide, and good luck finding large quantities of that in stores.

Clorox Clean-Up is a multipurpose cleaner that cleans, disinfects, and kills 99% of viruses and bacteria, including the Covid-19 virus. With the ongoing pandemic, this is a product I find myself using a lot at home and in my client’s spaces to get rid of Covid and keep everyone safe.

Plus, this cleaner cuts through grease, soap scum, dirt, grime, mold, and mildew stains. Clorox Clean-Up can be used to clean kitchen sinks, white cabinets, counters, doors, walls, tubs, toilets, showers, and tiles. It is also a disinfectant which is the only proven way to remove most viruses and bacteria.

Just spray the product onto the surface you want to clean and wait for 30 minutes before wiping clean. This product contains bleach (which is why it’s so effective on tough stains), so you want to use it in a well-ventilated area. Before using, open any windows in the room, and switch on the fans to promote better air circulation. It is also helpful to wear a mask when cleaning with this product and wait the full 30 minutes after spraying before you go back to clean with it. This is one of those products that work while it sits.

A lot of the offices we clean always have brown stains around the sink drain from the large amounts of coffee that gets poured down the sink. We just spray this in the sink, and let it do its magic with no effort on our part.

There are days when I do not have to use this product (except in toilets because I do not use bowl cleaner), but it is definitely one of those products I must carry with me at all times because there is really no substitute for it.

3. Vinegar and/or Windex

You probably already have this affordable, non-toxic multipurpose cleaning solution in your store cupboard. Most of us use vinegar for cooking, but it can also be used for cleaning.

Vinegar is acidic, and it can dissolve dirt, grease, and grime. Although it isn’t an EPA-approved disinfectant, vinegar’s acidic nature allows it to kill certain types of bacteria.

There are different types of vinegar, but white distilled vinegar is the best for cleaning, as it doesn’t stain surfaces. To make your own homemade multipurpose cleaner using vinegar, fill a spray bottle with a 1:1 ratio of water and vinegar. I prefer to use cleaning vinegar, as it is more powerful than regular white vinegar.

You can use this diluted vinegar mixture to clean a variety of surfaces including countertops (just not granite or marble), sinks, some faucets, showers, tubs, and toilets. You can also use this homemade cleaner to clean windows in place of Windex.

A lot of people do not like the smell of vinegar, so I use Windex instead. You can not add essentials oils to cover the smell if you are using it for glass and mirrors or hardwood floors (which is what I mostly use it for).

For multipurpose cleaning I add a tablespoon of, you guessed it…Lemon Pinesol.

4. Bar Keepers Friend

Kitchens, especially ovens and gas ranges, can accumulate a lot of grease as a result of regular cooking. This grease can sometimes be difficult to cut through, which is why I always carry Bar Keepers Friend Soft Cleanser.

This is my go-to product for cleaning oven doors, gas ranges, and removing stains from kitchen and bathroom sinks. I just squeeze, scrub with a non-abrasive sponge for 1 minute before wiping clean, rinse off then polish dry.

The great thing about this product is that it’s safe to use on a variety of different surfaces such as stainless steel, ceramic, porcelain, and glass. As such, you can use it to remove rust stains on stainless steel flatware, clean ceramic dishes, and glassware. I have noticed it even removes watermarks from faucets.

5. Stainless Steel Cleaner

Don’t mind my beat-up-looking bottle, it is over a year old. A little goes a long way!

Many kitchens nowadays are equipped with stainless steel appliances. Sleek and shiny refrigerators, gas ranges, microwaves, and dishwashers add a touch of modern charm to your home, and it’s important to have the right products to clean these surfaces.

My preference when it comes to cleaning stainless steel is the Home Depot Brand “Zep”. (It’s more expensive on Amazon). There are many stainless products out there as well, but what I have found is certain appliances work better with certain brands of stainless cleaner. However, this brand works well on EVERY stainless appliance I have worked with (and that’s hundreds!). Just a warning, it is on the greasy side, so a little bit goes a long way. You also must make sure you do not get any on the floor because it makes the floor super slick!

There you have it, my 5 must-have cleaning products under $5! These items are so good at what they do, and they are definitely my go-to products for cleaning. You don’t need to spend a fortune to have a clean home. With these budget-friendly products, you can have a squeeky clean home without breaking the bank.

Stay tuned for part 2 of this blog post, where I share 5 of my favorite “feel good” cleaning products and items for under $5!

Sending you squeeky clean thoughts,

Michelle M

January Cleaning

With a new year comes new plans, New Year’s Resolutions and new to-do lists. While we focus on health and wellness, our careers and our social lives, we can’t neglect the space we spend the most time in…our home. Cleaning your home unfortunately is not something you can neglect doing. Unlike your mental and physical well being, not cleaning will show its negative effects immediately. Neglecting to skip your workout for three days will prob not affect you too much. But try not doing any dishes for three days….you see my point? Cleaning is one of the most important things we must do whether we like to or not.

A lot of people will give you big cleaning projects to tackle in January, but they are not always realistic. A few I saw was “clean out your garage, clean out your attic, move your furniture and vacuum”. I’m here to tell you as a business owner of a cleaning company, that is not realistic! January is an extremely hard month for a lot of people to get motivated. I know it’s a month people join the gym, and set new resolutions, but for me, I still want to be in December, and my mind and body do as well. The first week in January might as well still be Christmas break. Just because the ball drops a day before does not mean we are ready or excited to dive right into our responsibilities. Overhauling my house is not even on my radar. Taking down the Christmas decorations is enough for me to have to push through. However, having said that, there are some items that I could just not put off anymore, and you likely can’t either. So instead of creating this long list of things you want to clean to start the year right, try tackling this short list instead. You too may need to tackle these, before they tackle you!

Your range hood

Photo by Ron Lach on Pexels.com

Our ranges take a beating over the Thanksgiving and Christmas holidays. They get clogged with debris and grease, and begin to lose their effectiveness in sucking out fumes. The best way to filter out smells and fumes from your oven is to keep your range free from build up. This is not a quick 10 minute process, but I promise you it won’t take more than 30 minutes. Bar Keepers Friend is a cleaner I love for this job and can be used on most range hood filters. You can find my quick tutorial on this on my Instagram

I neglected this until I could no more. I don’t want you to end up like me, with having a bad food odor linger in your house for hours! (some food tastes oh so good, but really stinks when you cook it). This is one of those “out of sight out of mind”, until it becomes “out of sight, but in your nose” kind of issues.

Your oven

Photo by Liliana Drew on Pexels.com

I was about to cook a meal for my parents, and when I started to pre-heat the oven, a ton of smoke came out. It was the worst time for me to realize that I should have cleaned my oven the weekend before. Do not let this happen to you! It can ruin the taste of the meal you are trying to serve. (Luckily it was just my parents or I would have been more embarrassed!)

This may be super easy for most of you, unless you have an old school kitchen like mine. You likely have a self cleaning oven setting, and a push of two buttons will clean inside your oven! You simply need to turn on this feature (preferably at night when you do not need to be in the kitchen) and let it run itself. Always leave a window slightly open if you can, and keep the vent on. If you have small children you may want to take them out of the home, and run the cycle while you are out. It is not recommended you use oven cleaner if you do have this feature. The oven cleaner can ruin the self clean feature in the future (check with your manufacturer). After the cleaning has run its full cycle, you simply need a wet rag or wet paper towels to wipe the ashes from the bottom. Super easy…if only my house had a self cleaning cycle…I digress. My customers save about 2 hours on Squeeky Clean cleaning fees, and don’t even realize they have it. Use it!! It’s a life saver!

If you have an old Oven like me, Easy Off Fumefree is my favorite product. It IS toxic, so I always use a mask, thick rubber gloves, turn the vent on and leave a window cracked. But I find that when I spray this at night, let it sit for 6-8 hours, and scrub the inside in the morning, most of the fumes are already gone. I use an SOS pad to scrub the mixture in, and sometimes my window scraper to scrap the glass window to give it that perfect clean.

There is an alternative to harsh fumes of oven cleaner and Easy Off, which is baking soda and vinegar. I have tried this, and do this for up keep in between, but I have to say it did not work as good this time, because my oven was in SUCH bad shape! But for those who wish to try, you will need baking soda, a bowl for mixing, a spray bottle and vinegar.

  1. Add about 1/4 cup of baking soda to the bowl
  2. Add water slowly until it makes a smooth paste
  3. Spread over the inside of your oven (making sure to not touch any heating elements)
  4. Let it sit for at least 10 hours
  5. Spray vinegar on the paste and let it foam up
  6. Using a lot of elbow grease, scrub the mixture up as you remove the residue and brown grease from your oven. I would use an SOS pad to scrub the oven clean along with the foaming mixture.
  7. Repeat Step 6 until all of the solution is removed and the oven is to your liking.

Your toiletries

January is the month we tend to try new beauty products. This simple exercise of throwing away old products, could take 10 minutes. Just as you would purge your clothing, go through your cabinet and throw away those bottles that have an inch of product in them, the ones you swear you’re going to use but really won’t, and anything old, expired, or leaking. This will make room for the new products you want to try, without cluttering up your space. 

I can’t tell you how many homes I have cleaned, including my own, and find multiple bottles with less than an inch of product in them. Use them up or THROW them away!! Extra bottles in your shower are breeding grounds for mold and bacteria!

While you cleaning out your shower toiletries, tackle your linen closet or medicine cabinet. You will be amazed how many products you have not used, and likely will not use. This simple 10-20 minute exercise can free up a lot of clutter!

Your coat closet

Photo by Meruyert Gonullu on Pexels.com

Man, is this a must on MY list! It amazes me how I forget to do this every year, only to be forced to do it while my kids are standing over me waiting to run out into the fresh fallen snow! I live in the Northeast, and we tend to not get snow until January. The first snow is what forces me to tackle my coat closet, and let me tell you, it’s too late at that point. It becomes a frenzy of trying to find matches for all the gloves that do not like to stay together, looking for boots that fit my ever growing kids, and scarves I forgot I had! Trying to get the kids ready for a snow storm sometimes feels like the dress rehearsal before opening night of a play.

Purging your coat closet in the beginning of the year (and for some, much earlier than January) will not only keep you organized, it can keep you from being late in the morning. Looking for gloves that fit, when you should be walking out the door is not a situation you want to find yourself in. “Sorry boss I am late, I couldn’t find my left glove”, is pretty high on the “lame excuse list,” as true as it may be. Tackling this before freezing cold season gives you the ability to organize what you have, do inventory of what you need and find it easier! (And yes, there is a difference between Winter and “freezing cold season”). It also allows you to donate items you no longer need to the many charities and non profit organizations that collect these items.

Conclusion

You thought I was going to give you 5 items didn’t you? Not this time, those 4 are enough for one month! A few of them are easy, a few of them require more time and effort, but the reward you will get from tackling these items will be worth it in the end! And you will feel the instant gratification from tackling this list!

Happy Squeeky Cleaning!

Michelle M

5 Items you should purge before the year is over

“Where did all this stuff come from??? Why don’t I have room for anything?” Does this sound like something you hear yourself saying way too often? I feel like I say it every weekend in my house. Chances are “all that stuff” came from Christmas presents. We receive a lot of things during the holiday, which add to our already cluttered storage, leaving us with little room to store our new things that we want to use. Why save this for “spring cleaning”?  NOW is the time to do a quick 10 minute purge, and I intend to help you  do just that with my quick tip for “5 items you should purge before the year is over”.

Sweaters

Photo by Tijana Drndarski on Unsplash

Yes there may be a lot of clothes in your closet that you can get rid of, but we are still in our busy season, and we just don’t have time for that. This quick exercise of getting rid of sweaters you haven’t worn, will give much needed space in your closet for two main reasons. First, sweaters are really bulky and take up a lot of space, unlike shirt that can be hung on a hanger.  Secondly, sweaters rarely go out of style, which causes us to save them, because we think we will wear them. Check yourself, and do a quick inventory- My rule is if you didn’t wear it last winter, chances are you will not wear it this winter. Time to give them away. Just getting rid of 3-4 sweaters will create much needed space immediately.

Candles

Photo by Noelle Australia on Unsplash

My bet is you received at least one candle for your birthday, this holiday, or both! If you are like me, you have a collection of half used candles that you swear you will finish using….soon. Toss them!! You will continue to get new candles every year and every season. Have you ever walked past a candle in a store, that you thought smelled great, and didn’t buy it? I’m guessing not. Candles are so cheap, and give us that quick fix of relaxation we want in our home, they are an easy and sensible purchase for us….which is why you have too many! Throw away your half used candles, you will not miss them, and you will be amazed at how much space you will gain from this quick little project. I was holding on to half used tea lights! Why??!!! They had to go!


Toys

Photo by Hannah Rodrigo on Unsplash

My kids get so many toys each year, and though my youngest still plays with all of them, I have learned that I still need to remove some so he doesn’t get sensory overload. I either box them up in plastic bins I hoard have, or donate them to friends who have younger kids than me, or my favorite, I sell them on Facebook yard sale. Don’t ask me why I get such a thrill out of selling a toy for $3. Just finding a few bulky toys to remove, can give you much needed space for the new ones.

Towels

We have a ton of towels. We get them gifted to us all the time, which I love, but they always take over my linen closet if I don’t purge them. Any towel that is discolored, has a bleach stain, or dirt that wont come off, gets tossed (or moved to the garage for “dirty” cleaning jobs). If any of your towels resemble this at all, its time to throw them away! And please don’t cut them into rags!! They leave lint and frayed cotton everywhere when you wash them or try to clean with them.

Scarves and gloves

Photo by Aleks on Pexels.com

Last, and certainly not least, are scarves and gloves. If you are like me, and love updating your scarves and gloves each year, then you likely need to purge these as well, for the sake of your coat closet! I counted mine last week and I had (past tense) 12 scarves that were just mine! I only use the same 3 each season, so guess what is happening with the other ones? They are just sitting there collecting dust and taking up space. After I purged all those scarves, my coat closet looked so much more organized! And because I have nice scarves, I was able to donate the excess scarves to the local church near me who takes these types of donations, which also made me feel good to know these beautiful scarves were being put to good use.

Each of these exercises took me less than 10 minutes. I didn’t overthink it, I gave myself a time limit, and I didn’t go on a crazy purge like you see them do on television. The point was to do this quickly so I could make room for my new items, and move on the next quick task. I will schedule time for a big purge when I have more free time (and will power) to do so. For now, I needed a quick easy solution for cleaning up my living room after Christmas Day.

If you find other items in your house that are useful for this exercise, I would love to hear them! 

Sending you Squeeky thoughts!

Michelle M

Whats in my bucket?

The essential products I never clean with out.

As a professional cleaner, I often get asked what cleaning products I use. These days, there are so many options available in the supermarket, and choosing the right products can be hard!

Through years of experience, I’ve identified certain products that are a must-have in my cleaning bucket. They do the job well, and they provide a huge bang for your buck.

So today, I’m going to share with you the 7 products that I swear by as a professional cleaner. With these 7 things in your cleaning bucket, you can pretty much clean just about anything.

1. Lemon Pine Sol 

Lemon Pine Sol is hands down my favorite cleaner, and I have never cleaned with out it. It is my “hero” product one could say. It is a multi-surface cleaner and deodorizer with a fresh lemon scent. I use this product for its deodorizing element and sanitizing capabilities. Although it’s not a disinfectant (only regular pine sol is), the deodorizing element breaks down urine and neutralizes odors.

This product works well on a variety of surfaces. I use it to clean baseboards, furniture, hardwood and regular flooring, toilets, sinks, and even wipe down walls.

Also, Lemon Pine Sol is a concentrated cleaner that can be diluted for most cleaning jobs, so one bottle goes a long way!

It’s budget-friendly and leaves your home smelling nice and fresh. It is one of the only non toxic products that never give me a headache.

2. Microfiber cloth

Who needs disposable paper towels when you can buy reusable microfiber cloths for everyday cleaning?

These soft microfiber cloths are great for cleaning virtually any surface. Since they’re non-abrasive, you can use them to clean windows and glass surfaces without worrying about causing scratches.

They also capture tiny dust particles, so you can wipe down surfaces without leaving streaks. Plus, they come in a variety of colors, so I often get different colors for different rooms. This way, I don’t mix up the rags used for cleaning the bathroom with other rooms.

3. Windex Multi-Surface Cleaner

This is the next must-have in my bucket. This product is great for cleaning bathrooms, tiles, and flooring. In addition to regular flooring, Windex is an excellent cleaner for hardwood and laminate flooring as well. I mix this with Pine Sol for almost all my floor cleaning.

People often feel that they need to buy different cleaners for different flooring, be it tiles or hardwood, but this simply isn’t the case. Windex is a great all-in-one cleaner that you can use across different types of flooring. The only flooring it cannot be used on is marble.

4. Clorox Clean Up

I use Clorox Clean Up to get rid of tough shower mold, coffee stains from sinks, and as a disinfectant for toilets. It removes bacteria as well as neutralizes odors.

I try not to clean with it until after I’ve let it sit for a while. I usually spray it in the shower and toilet, open a window (or turn on the vent), leave the room and let it do its work for 30 minutes.

The fumes can be very strong, but unfortunately there are just some things natural cleaners won’t get out, no matter how hard you scrub! 

5. Reusable rubber gloves

When using strong cleaners like Clorox Clean Up, it’s always best to wear rubber gloves to avoid any direct contact with your skin. These rubber gloves are reusable, and they literally fit like a glove, so you can work comfortably in them.

When buying gloves for cleaning, try to get ones with non-slip embossed palms. This gives you a good grip, especially when you’re working with soap and water, and things get slippery!

6. Stainless Steel Cleaner

This is a must if I’m cleaning a kitchen with stainless steel appliances. Windex will not work, it will just streak.

One of my favorites is Weiman Wipes. In fact, I keep them handy in my own kitchen for daily cleaning! These wipes clean and shine any stainless steel surface. You can use them on stainless steel refrigerators, microwave ovens, and range hoods.

Other than that, Zep Stainless Steel Cleaner & Polish also works well. It can be used to clean and polish stainless steel, aluminum and other metal surfaces in your home. However, avoid using this on natural stone surfaces.

7. Dish soap

Believe it or not, I use this for every single gas range I have to clean!

After days of cooking, our gas range tends to accumulate oil splatters and grease. Regular cleaning products aren’t as effective at cutting through the grease build-up quite like dish soap.

Think about it this way – when we have super greasy dishes, we reach for the dish soap to clean them. Likewise, dish soap is a home cleaner’s best friend when it comes to cleaning a greasy gas range!

Dish soap is also great for cleaning microwaves. Add some dish soap to a bowl of warm water, then using this solution and a sponge, wipe down the interior and exterior of your microwave. Once you’re done, make sure to wipe down with a damp rag to remove any suds.

Likewise, you can also use dish soap and water to clean the exterior and filter of your range hood.

I’m always so amazed by how much use we can get out of a bottle of dish soap. So if you think dish soap is just for washing dishes, think again!

Conclusion

These 7 products have helped me to keep my customers happy and their homes spotless!

So, the next time you’re standing in the cleaning supplies aisle of the supermarket, feeling confused about what to get, look back on this list. You can’t go wrong with these 7 must-have essentials!

Sending you squeeky clean thoughts,

Michelle M 

The Ultimate Guide to Mold Free Showers

I’ve been in the cleaning business for close to 30 years now, and the dirtiest place in any home is almost always the bathtub and shower. It’s ironic that the place we go to get our bodies clean is the dirtiest place in the house. Why are showers the last thing to get cleaned?

Perhaps because we can close the shower curtain over it, or shut the bathroom door and use our powder room during the day. I know for me, even as a professional, I don’t have time to clean my showers the way I do my toilets and sinks (those get a scrub down at least 3 times a week). 

Mold, mildew, and bacteria build up at an alarming rate, and not only does this look bad, it can also make us sick. According to the CDC website, there is evidence linking indoor exposure to mold with upper respiratory tract symptoms, coughing, and wheezing. Some studies even suggest that early exposure to mold could lead to development of asthma in some children. Thus, it’s important to take precautions to keep mold away.

There are things you can do to prevent mold and mildew build-up without needing to scrub your shower every day. I have a system that keeps my shower free from mold in between cleanings, which usually happen once or twice a month. Here are my top 7 tips for mold free showers:  

1. Ventilation!

This is the most important way for keeping mold and mildew out of your shower in between cleanings. Leave your shower curtains and bathroom windows open after your shower to allow air to circulate and to get rid of excess moisture.

If your bathroom gets any sunlight, keep your blinds open during the day. Mold loves dark and moist places. Sunlight helps to dry things up naturally and keeps your space brightly lit, making your bathroom less susceptible to mold. If you have a vent or fan in your bathroom, keep it on for at least half an hour after your shower to further help with the drying process.

If you have a windowless bathroom, consider using a dehumidifier. This will help to remove excess moisture and keep your space dry.

2. Use a shower spray.

This really does work! I spray our shower curtain, our rubber mat, and all the tiles after I shower at night. I also lift the rubber mat and let it dry on the side of the tub. Remember, mold loves to hide in dark places like rubber mats and closed showers.

You can buy shower sprays at the store, or make a DIY spray with equal parts water and vinegar in a spray bottle. Add a few drops of lemon essential oil for a fresh, citrusy scent.

3. Be mindful of your shower products.

Water tends to accumulate under your shower products, encouraging mold to grow, so consider drying your products and the areas underneath regularly. Alternatively, you can keep your products on a wire shower rack to keep the air circulating and the bottom of your products dry.

4.  Use Clorox Clean-Up or bleach on your caulk, grout, and tiles.

The rims of your tub are the place mold grows the fastest. Water tends to build up there and not run off, making it a prime spot for mold to grow. Spraying Clorox Clean-Up twice a month will keep the mold from building up. Make sure to crack the window open or leave your vent on while this dries, in addition to wearing a mask. You don’t need to stay in the bathroom and clean, just spray and walk away. 

Another method you can try is to fill a container with ½ cup bleach and 3 cups hot water, pour it over the tiles, and let it sit for a few hours. You’ll be amazed at how well this removes mold without you needing to scrub it. 

Please note that if you have a stone shower of any kind, you must use a product that is safe for stone. Avoid using Clorox or bleach. My go-to product for cleaning grout in stone showers is Goo Gone Grout & Tile Cleaner that is safe for stone and porcelain.

5. Wash your shower curtain.

Did you know that all kinds of bacteria and mold can grow on your shower curtains? Some can even cause body odor! The very place you go to get rid of BO could be contributing to it.

As such, it’s important to remove your shower curtain monthly and clean it in hot water and bleach. This can be done right in your washer machine. Do not put it in the dryer. Just hang it back up in the tub and let it air dry.

6. Re-caulk your shower.

Sometimes there is nothing you can do to get mold off your grout lines or caulk. When that happens, it’s time to re-caulk your shower. I do it once a year, because I know even though I can’t see the mold, it’s trapped behind the caulk.

Here’s a YouTube video that shows you how to do this, and here are some of the tools you’ll need:

It really is much easier than it sounds. The most difficult part is scraping and cleaning the surface before you reapply the caulk. Having the right tools can make this process easier and neater, so consider investing in a few of these tools.

7. Keep a lookout for any leaks and fix them immediately.

If your shower head is leaking, odds are your tub is usually wet, making it the perfect breeding ground for mold. Look out for any leaks and try to fix them immediately. Excess moisture in the bathroom is always dangerous!

Many of us have busy schedules, and trying to clean the shower thoroughly twice or thrice a month is just too much! But that doesn’t mean you have to suffer with mold in your bathroom. You deserve to get clean in a squeeky clean shower, so be sure to apply these 7 tried and true tips in between cleanings to prevent any mold build-up.

Sending you Squeeky clean thoughts,

Michelle M

The Most Overlooked Places to Clean in your Home

When we clean our houses, we often target the more obvious areas such as the floors, countertops, windows, and furniture. However, there are less obvious places that we tend to forget about. You may be thinking that you can barely keep up with the visible dirt…now I have to search for dirt? Unfortunately, yes you do. But don’t worry, I’m here to help!

I’ll walk you through the most overlooked places in your living space that you tend to miss when cleaning. Add these places into your cleaning routine, and you’ll soon have a Squeeky clean home for sure!

1. Bathroom vanity light fixtures and bulbs

We usually clean our bathroom mirror and sink regularly, as dirt and grime tends to be visible on these surfaces. However, bathroom vanity light fixtures and bulbs are often overlooked. They can attract dust and dirt, so it’s important to clean them regularly as well.

Windex or a water and vinegar solution works fine here. It’s best to clean them with the lights switched off. Cleaning any electrical item with water while it’s switched on can be hazardous.

2. Curtains and curtain railings

Curtains, especially dark-colored ones, may look perfectly fine from afar. A closer inspection, however, may reveal dust and dirt clinging onto the fabric. Imagine cleaning your living room, just to pull open the curtains and have all that dust fly all over the place!

Use the brush attachment on your vacuum to remove any dust from your curtains once every two weeks or so. You can also use a damp cloth to give the curtains a thorough wipe down.

Once every season, you should take down your curtains and give them a wash. Run them through the delicate cycle on your washer, if the fabric permits. Wipe your curtain railings with a damp cloth before hanging the clean curtains back up.

3.  Closet floors

It’s hard to see dust on the closet floors when shoes are always covering it, but trust me, it’s there. This is the room you sleep in, and you don’t want to be inhaling all that dust, especially if you have allergies! So, it’s imperative that your closet floors gets cleaned once a month.

 Remove all the shoes and boxes covering the closet floor. Next, vacuum the floor before going in with a microfiber mop. Don’t forget to wipe the baseboards as well.

4. Shower products

I notice that a lot of people clean their showers, but they neglect to clean and wipe off their shampoo, conditioner and body wash bottles. These bottles often get wet in the shower and trap moisture underneath. As a result, they tend to accumulate mold and bacteria that can make you sick.

Consider cleaning these products every time you clean your shower or tub. If they seem a little grimy, clean them with a cloth and cleaning solution, before drying them off with a dry cloth or kitchen towel.

Do this, and you’ll notice a difference in the overall cleanliness of your shower right away. 

5. The Ceiling

Like they say, out of sight, out of mind. Our ceilings are not in our eyeline, so we often forget to clean them. However, they begin to accumulate dirt and cobwebs over time. So be sure to look up once in a while to spot those unsightly cobwebs and get rid of them!

You can easily clean the cobwebs that form in the upper corners of your rooms using a cobweb duster. Any other dirt can be cleaned with a duster or mop with an extendable handle.

6. Trash cans

Many of us throw out the trash and call it a day. However, our trash cans are home to bad odors, food particles, and bacteria. It’s important to wipe down and sanitize our trash cans regularly.

Wash your trash cans with running water to get rid of any gunk or spills at the bottom before wiping down with a disinfectant.

There you have it, the 10 most overlooked (and dirty) spots in the home! So next time you reach for those cleaning supplies, don’t forget to clean these places as well. 

7. Patio furniture

This is something that is likely used all spring and summer, but we rarely think about cleaning it. Patio furniture can become a breeding ground for mold and bacteria as it’s exposed to moisture from all the rain.

Plus, if you enjoy having meals or drinks outside, your patio furniture may have stains here and there from food spills. This could attract all sorts of bugs and pests, and we definitely don’t want that!

If your chairs have removable fabric covers, run the covers through the wash. You could also power wash your furniture when you’re cleaning the patio. This is what I usually do, and it works great, especially for metal patio furniture. Usually twice a season does the trick.

And last but but certainly not least,

8. Your  Mattress

We change our sheets regularly, but it’s also equally important to clean our mattress! Vacuum your mattress once a month to get rid of any dirt, dust, and dead skin that gets stuck on it. All this nasty stuff can trigger your allergies.

While vacuuming can get rid of visible dirt, spraying your mattress with an antibacterial spray helps to get rid of any invisible germs that might make you sick.

Also, many of us sweat when we sleep, especially in the hotter months. Your mattress absorbs this moisture, leading to mold and bacteria growth. So when you’re changing your sheets, pull open your curtains and let some sunlight in. Allow your mattress to dry nicely before putting on new sheets.

There you have it, the 10 most overlooked (and dirty) spots in the home! So next time you reach for those cleaning supplies, don’t forget to clean these places as well.  

Don’t try to tackle this all at once. Things like cleaning your shower products and vacuuming your mattress can be done once a month, but doing your patio furniture and curtain railings only need to be done twice a year. As you become more aware of these areas, you will start to naturally incorporate them into your cleaning routine. You will be cleaning like a pro in no time! Than you should reward yourself with a cup of tea or coffee in bed!

Sending you Squeeky thoughts!

Michelle M

Do’s and Don’t for cleaning Hardwood Floors

Hardwood floors are gorgeous! They add an attractive rustic charm to your space, and can be pretty durable if cared for correctly. However, there’s often a lot of confusion around cleaning hardwood floors.

In fact, one of the questions I frequently get asked is, “How do I clean my hardwood floors?” Today, I’ll be answering this popular question, and I’ll also cover all the important do’s and don’ts to preserve your wood flooring. Apply my tips and you’ll have clean, shiny wooden flooring that lasts the test of time!

First and foremost, before you start cleaning, you must know which type of flooring you have. There are several types of hardwood flooring namely solid wood flooring, pre-engineered, luxury vinyl, and laminate. 

The four cleaners I use for hardwood floor cleaning are lemon Pine Sol, Bona, ammonia-free Windex, and vinegar. Let’s discuss each type of flooring, and the products you should (and shouldn’t) be using on them.

Solid Wood Flooring

This is my favorite type of flooring, and by far the easiest to keep clean! These are the floors in my daughter’s Blake’s room, and they are original to the house. I am a firm believer in restoring as much of a house as possible, so we were able to save 2 bedrooms of our home’s original hardwood flooring. It is the most difficult to keep from warping and getting destroyed and isn’t the most durable. When I moved into my home, we were not expecting to replace any of the hardwood flooring, but when the homeowner lifted her large area rugs, the floors were buckled underneath from water damage, due to watering plants and dog urine. If you have solid wood flooring, I highly recommend that you look under your stationary area rugs occasionally to make sure water hasn’t gotten trapped underneath.

Solid wood floors are the easiest to clean. I use a bucket of water, two caps of lemon Pine Sol, and ¼ cup of vinegar to mop the floor.

You want the mop to be slightly damp, not wet. Excess water can damage your wood flooring, so be sure to wring out the mop well. Spin mops are great for this as you can easily wring out any excess water with the bucket attachment.

You can also use Bona or Murphy’s Oil for cleaning, but I find them unnecessary when vinegar and Pine Sol are so much more affordable.

Pre-Engineered Flooring

This is the most durable of all hardwood flooring because it’s not easily subject to damage and warping. There is a thin layer of “real wood” wrapped around plywood on each plank. It is also coated in the factory, making that top protective layer more durable. With that being said, that top protective layer can also leave footprints and streaks when you clean your floor. I love the way my floors look, but I hate how easily they lose their shine!

For these floors, you need a terry cloth sponge or a stick mop, and a spray bottle filled with a mix of half vinegar and half water plus a capful of Pine Sol. The key to getting these floors clean and streak-free is the drying process. If you mop them with a regular mop, they will dry streaky. The terry cloth sponge with small amounts of this solution will clean and dry with your back and forth motion.

You may also use Bona hardwood floor cleaner on these types of floors. I’m not a huge Bona fan, but I must use them on my floors because everything else leaves streaks. I have pre-engineered Brazilian Tiger wood, and boy do they show EVERYTHING! Even if a fly lands on them, you can see their tiny footprints! 

So I clean them first with vinegar and water to remove all the dirt, and then follow up with Bona for the shine. I don’t recommend using Murphy’s Oil, Orange Glow, or any other type of wood flooring product. Those products are meant for solid wood flooring only. 

Luxury Vinyl

This is probably the other easiest floor to clean, and requires the least ‘arm strength’. You can use a terry cloth mop, a regular string mop, or any other mop that gets the job done. You can use water, lemon Pine Sol, and vinegar or ammonia-free Windex as well. On the plus side, you don’t have to towel dry these floors, nor do you have to worry about damaging them with too much water.

Luxury vinyl is the most resistant flooring out there today, and it’s no surprise that most people opt to have this in their home because of its durability.

Laminate

These floors are the most sensitive. As such, you must be careful to only use the recommended cleaner for these types of floors, or you will ruin them. One of the cheapest and safest cleaners is a home-made solution of dish soap and hot water. One teaspoon of dish soap mixed with hot water in a spray bottle is good enough for these floors. If you need to remove build-up, vinegar and ammonia-free Windex are the only things you should use.

And be sure to always wring your mop to almost dry! If you are spraying solution on the floor and cleaning with a dry cloth, use the spray solution sparingly. Too much water and oil based products are a big no-no for laminate flooring. 

General Care Tips For Your Hardwood Flooring

In addition to choosing the right cleaning solutions and tools for you hardwood flooring, there are also some general care practices that should be followed to take care of your flooring and prevent any damage to them.

Here are a few tips to keep in mind:

  • Sweep your floors often to get rid of any grit or abrasive materials. Avoid using stiff-bristle brooms to sweep as they may cause scratches on your flooring. Use soft-bristle brooms instead.
  • Take your shoes off at home. Dirt and grit often get stuck to the base of our shoes. Sometimes even the odd nail! Walking inside with your shoes on could bring these abrasive materials into your home and damage your flooring.
  • If you have pets, trim their nails regularly to prevent scratch marks on the floor.
  • Always lift and carry your furniture, don’t drag! To further protect your floors from scratches or damage, you can buy felt pads for the bottom of your furniture.

Taking care of hardwood flooring can seem daunting at times, but don’t worry! Follow these cleaning and general care tips, and you’ll be well on your way to having shiny, durable hardwood floors that give your home an added ‘wow’ factor!

Sending you squeeky clean thoughts,

Michelle M